Financial-Statements
FINANCIAL STATEMENTS
PURPOSE:
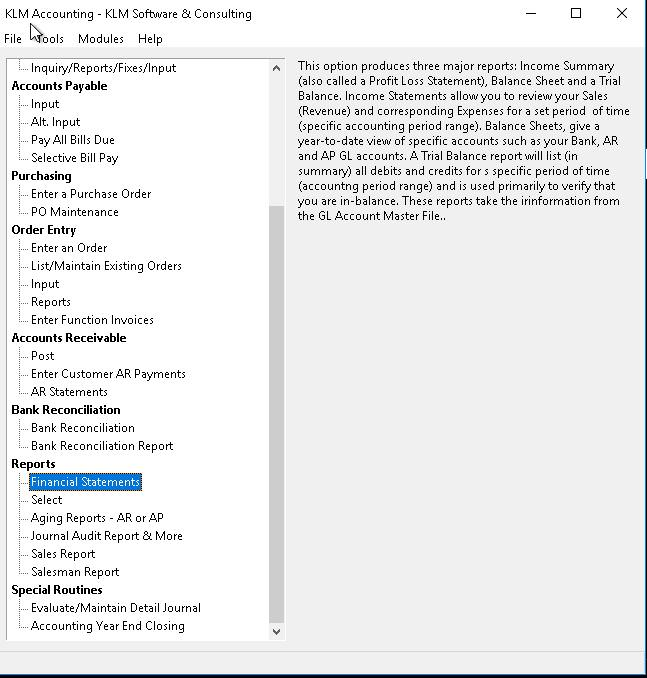
This option provides three different methods of reporting and reviewing your company's performance. Among the primary reasons for using these reports are; to review cash flow, determine net profit or loss, provide balancing information and produce reports for outside parties.
Income Statement: Lists the sales (revenue) and expenses to show the profit or loss for any given time period. Run this report when filing Income Taxes and/or GST/HST/Retail Sales Tax remittance forms.
Balance Sheet: Lists assets, debts and equity (assets minus any debt) to show how healthy the company is. Run this report when filing GST/HST, Retail Sales and Payroll Tax Remittance forms or when comparing figures from other reports.
Trail Balance: Lists each GL Account and a summary of the activity in each account for a given time period to confirm whether the books are in balance.
REQUIREMENTS:
Reports will not print unless the following files exist:
- A valid Company Master File.
- Valid GL Account Master File.
- Valid Transaction Type records in Type Codes File.
- Detail Journal Entries for the period in question.
The layout of these reports, at which point totals are printed and even the paging is controlled by the information stored in the GL Account Master File and the Transaction Types. As this information is taken from the GL Chart of Accounts Master File, this file must be up-to-date. Be sure to Post & Link ALL GL entries (see Evaluate/Maintain Detail Journal for further instructions) or information on these reports may be out-dated.
PRINTING INCOME STATEMENTS
Compare any of the following:
- Compare actual figures to budget figures
- Compare current year to any other year
- Compare current period to year to date
- Compare the first quarter to the second
- Compare up to six periods at one time
Select from five reporting types:
- All details (all accounts)
- All divisions (separated)
- Consolidation (all divisions together)
- One division's accounts
- Summary amounts (totals only)
Division or departmental reporting on Income Statements can only be done, if the appropriate setup was done at the time your GL Accounts Master file was created.
1) At the Accounting Main Menu, select Financial Statements. A print selection screen will appear. Choose from the prompts, to customize the report.
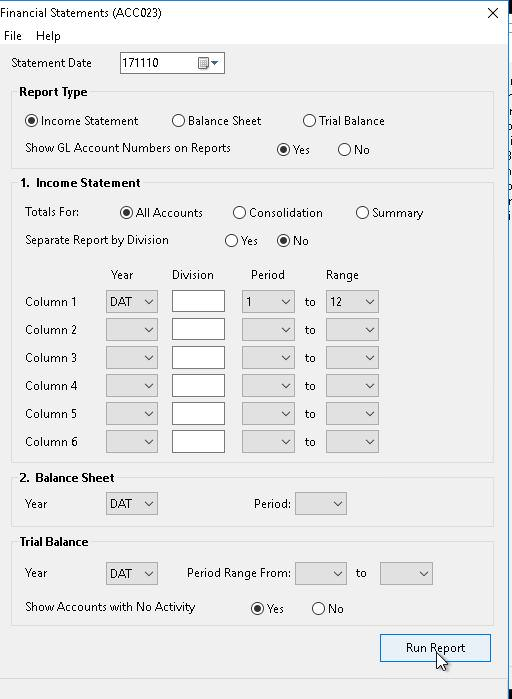
2) Once all options have been selected, click on the RUN REPORT button. A Print Preview screen for said report will appear. You can choose to either print the report or close the Window and select another report.
Report limits:
Statement Date: Defaults to current system date. Informational only, has NO effect on what is reported.
Report Type: Defaults to Income Statement. Leave as is.
Show Acc No On Report: Defaults to YES. If YES selected the GL Account Number for each Account prints to the left of the Account’s Description. NO suppresses the printing of Account Numbers.
Totals For: Determines what is printed on the report. Defaults to All Accounts which prints one line of data for each active GL Account (must be selected if report is for more than 1 division). This is set as the default. Consolidation prints a summary of ALL divisions, while Summary prints a summary figure for each category or transaction type. Best used for obtaining grand totals.
Separate By Division: Defaults to NO. If YES selected report prints each division separately then prints a final total "summary" report of ALL divisions.
Year: Enter a Valid Data Year. Program defaults to the current data year. Helps determine data files to be accessed.
Division: Enter a Valid GL Account Division to limit all accounts to that division.
Period: Limit the Amounts printed to a specific Range accounting period or periods within the specified file.
PRINTING A BALANCE SHEET
When selected, the program prints ONE line for each active GL Account. The dollar amount is a Year-To-Date total of ALL entries up to and including the period requested. The Balance Sheet Total Assets must match the Total Liabilities and Equity. Remember assets appear as a positive/debit figure and liabilities/equity are stored as negative/credit figures. If the balance sheet is out-of-balance (assets don't equal liabilities plus owners equity) run a Trial Balance report (Option #3). If still out of balance see the Journal Audit Reports Menu option for further instructions. The Net Profit /Loss figure listed on the Balance Sheet is calculated each time this report is run.
1) From the Accounting Main Menu, select Financial Statements. A print selection screen will appear. Choose from the prompts, to customize the report.
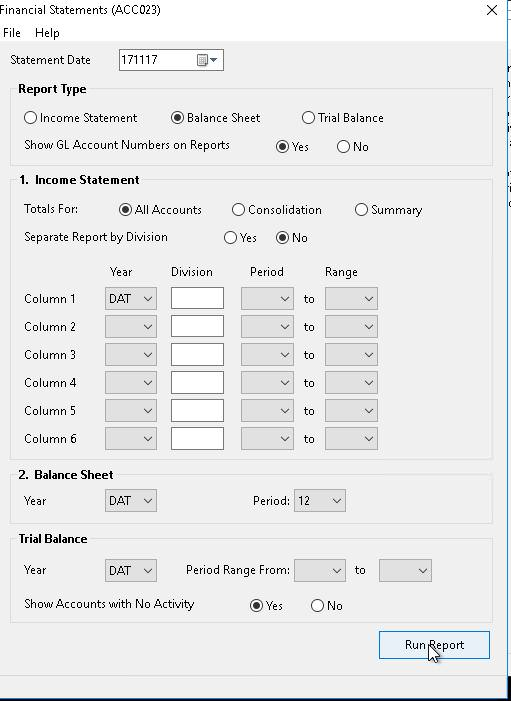
2) Once all options have been selected, click on the RUN REPORT button. A Print Preview screen for the report will appear. You can choose to either print the report or close the Window and select another report.
Report limits:
Statement Date: Defaults to current system date. Informational only, has NO effect on what is reported. Use the “Select Date” (down arrow) to pick a new date for report.
Report Type: Defaults to Income Statement. Select Balance Sheet.
Year: Enter a valid Data Year. Program will default to the current (DAT) year.
Period: Allows limits to the Amounts being printed to a specific accounting period for reporting. Only values up to and and including that period will be reported on.
PRINTING A TRIAL BALANCE REPORT
This report should be run at least once per accounting period, usually at month end. It serves as a overall balance check. The total debits (plus figures) must match the total credits (minus figures). If they do not, something is wrong and you will need to isolate the problem and fix it.
The program prints one line of information for each active GL Account. You are given an opening balance (the total of all debits and credits up to the period range requested), the total debits and credits for the period range requested and a final closing total. Opening and closing totals should balance to zero. Debits and credits for the period range in question should be equal (i.e. Debits = 5000+ and Credits = 5000- ).
1) From the Accounting Main Menu, select Financial Statements. A print selection screen will appear. Choose from the prompts, to customize your report.
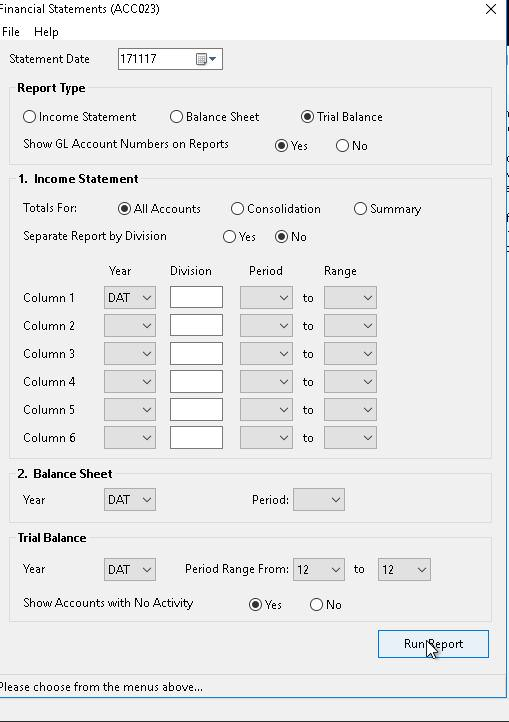
2) Once all options have been selected, click on the RUN REPORT button. A Print Preview screen for said report will appear. Choose to either print the report or close the Window and select another report.
Report limits:
Statement Date: Defaults to current system date. Informational only, has NO effect on what is reported. Use the “Select Date” (down arrow) to pick a new date for report.
Report Type: Defaults to Income Statement. Select Trail Balance. Enter a valid Data Year. Program will default to the currant (DAT) year.
Period Range: Limit the Amounts being printed to a specific accounting period or periods.
Show Account With No Activity: Defaults to Yes. If YES selected ALL GL Account Numbers are printed (beside their descriptions) regardless of whether there was any activity for the period range requested.
GOVERNMENT REMITTANCE FORMS
As the government reports by month, you will need to know which accounting periods fall within the required month range. The default Chart of Accounts provided by KLM, contains the necessary GL Accounts associated with the standard government remittances.
Goods & Services Tax (GST/HST):
With few exceptions, ALL Canadian Companies must remit to the Canadian government the amount of GST/HST collected less any GST/HST paid for supplies. Provided the GL Accounts have been set up, a Balance Sheet for the last month/period, in the required range will provide the actual dollar amounts (collected from sales/paid on supplies). An Income Statement for the month/period range required will give you the sales total required as part of the remittance form.
Retail Sales Tax (PST)
While almost ALL Canadian Companies pay GST, the collection and remittance of retail sales tax varies, from province to province. Provided a GL Account has been set up, a Balance for the last month in the required range will provide the actual dollar amount of sales tax collected.
An Income Statement for the month/period range required will give you the sales total required for the remittance form. Keep in mind that not all sales have retail sales tax applied to them (not all items are taxable) and thus these figures may not be accurate.
Payroll Remittances
If you are using the KLM Payroll and posting the information on a regular basis, all the necessary information has been transferred to the accounting section.
Provided GL Accounts are set up, a Balance Sheet for the last month/period in the required range, will provide the actual dollar amounts for payroll remittances of UIC, CPP/QPP, and Income Tax . Compare this information with the results from the Payroll Earnings & Remittance Reports.
CURRENCY EXCHANGE SETUP
The following is an explanation on how the system is responding to exchange, two optional methods.
METHOD #1:
For Tax Return Reporting Purposes;
Yearly adjustments are made by the Accountant for currency gain or loss based on a list provided by the KLM system of all US accounts and the totals in US dollars. The Accountant provides the adjustment journal entries for the year based on his assessment of this information.
Both options require that a separate US GL Account number be set up for all applicable postings and that these accounts must be used during all transactions entered in US dollars. Unless entered by an operator, no journal adjustments are made to compensate for the values stored in US dollars. When viewing the journal only the GL Account would indicate to you if the amount was in US or Canadian dollars.
For the Customer;
The need to view the Income Statement profit/loss in one currency (Cdn) was met by converting the total against any accounts that were indicated to be US. These conversions applied only on the Income Statement and were based on a rate set by the customer. Because these conversions created no journal entry adjustments the Balance Sheet Net Profit would not match the converted Income Statement Net Profit.
METHOD #2:
When a BILL or INVOICE is posted with a valid currency indicator (i.e. US) in addition to the normal postings, extra postings will be generated based on the US exchange rate in the system at the time of posting (change rate daily or monthly if desired). The exchange calculated and posted is based on the expense and revenue account values only (Income Statement Accounts). The exchange will be applied to the appropriate account to increase or decrease it so that the account will show in Canadian funds. The offset of this exchange adjustment can be applied to any account but you may wish to place it near the net profit on the balance sheet and call it Income Statement currency automatic adjustment balance.
The following are a list of benefits over method #1;
- The US currency indicator on US Income Statement Accounts no longer needs to be set.
- No need to have two accounts and TYPES setup (US & CDN) for like revenue and expenses. Less chance for operator error, only the currency on the invoice needs to be set.
- If you choose to adjust your currency rate daily or even monthly, historically, you will have a more accurate idea of your profits due to dollar variations throughout the year.
- The net profit on the balance sheet will match the net profit on the Income Statement.
- When viewing and reporting the journal, details will total in one currency and you will be able to still see the original US entry for an invoice along with the exchange amount
BALANCE SHEET - SHOW BOTH US & CANADIAN VALUES
The US Balance Sheet Accounts show in US dollars, which is needed and a valuable piece of information but when evaluating cash flow it would be a benefit to also see the values in Canadian Funds along with the other accounts.
To trigger the balance sheet report to display these converted values during the report (no postings are generated) based on the current exchange rate in the system (see Type Codes Menu - Option C) the appropriate accounts must contain the currency indicator (i.e. US).