ZKTecoAdmin
ZK Teco Attendance Management
Setting up Employees:
To setup new employees choose the Employees Icon from the main screen.
Click Add
The only really important items are:
- The person must have a name or their punches won't be seen by KLM
- In the No. field put the employees KLM Employee Number
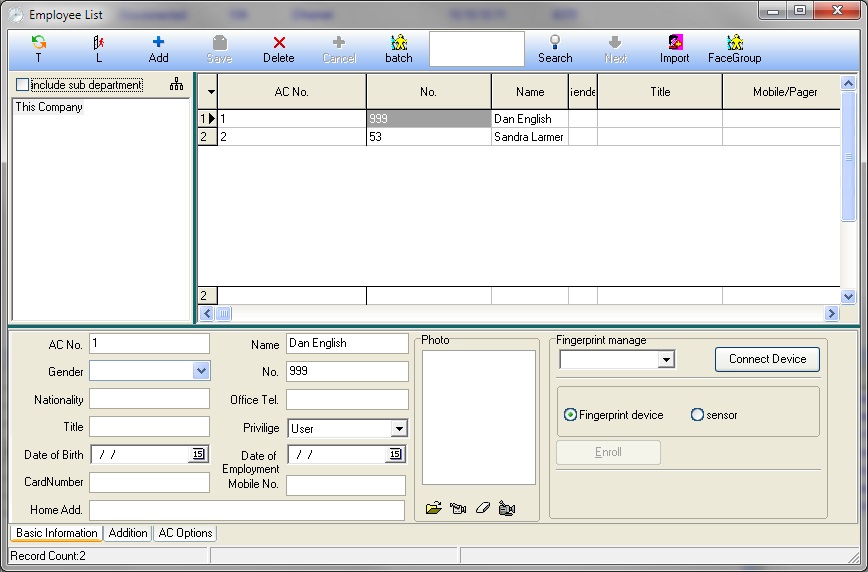
Click Save to save the new employee.
Uploading Employee Info (PC to Time Clock)
Once an employee is entered the info is uploaded to the Time Clock
Choose "Upload user info and FP" (Finger Print)
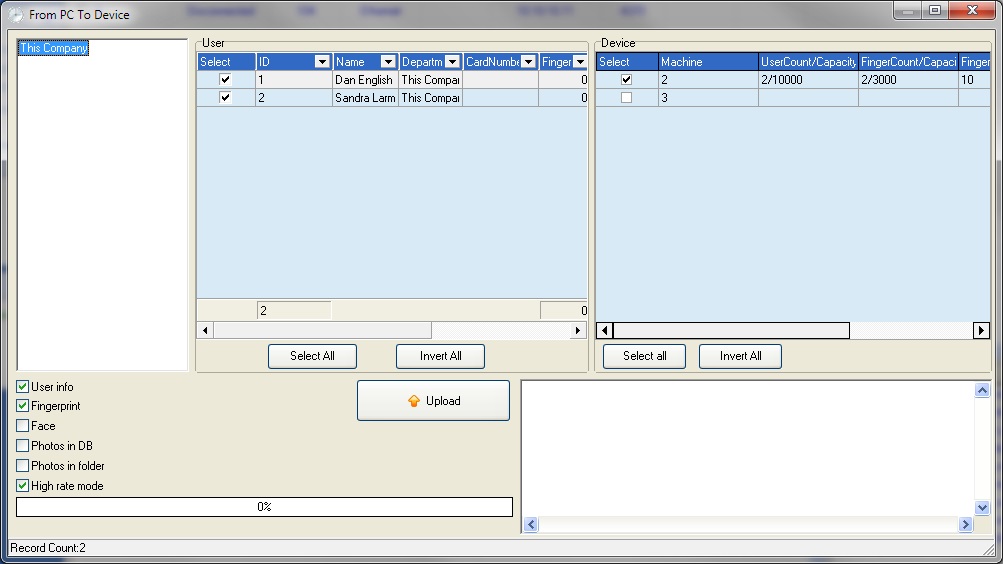
Choose "This Company". All Employees will be listed
On the User Side:
Choose "Select All"
On the Device Side:
Select all Devices to upload the user info to. Click "Upload"
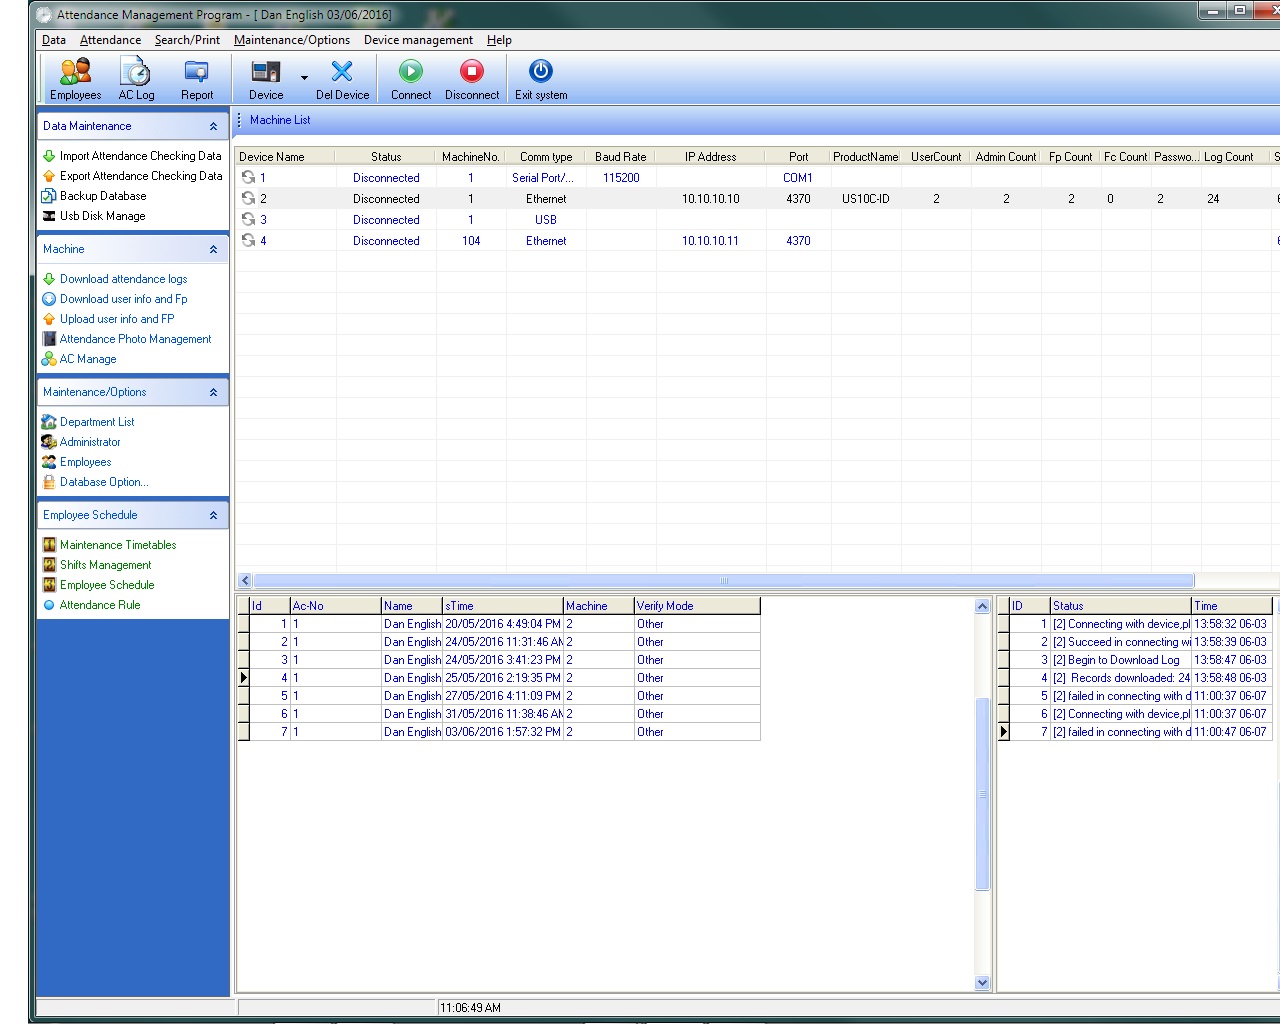
Downloading Employee Info (Time Clock to PC)
When data has changed on the Time Clock it is backed up to the PC. This would be done when a new employee is added and the fingerprint is recorded in the Time Clock.
Click "Download user info and Fp"
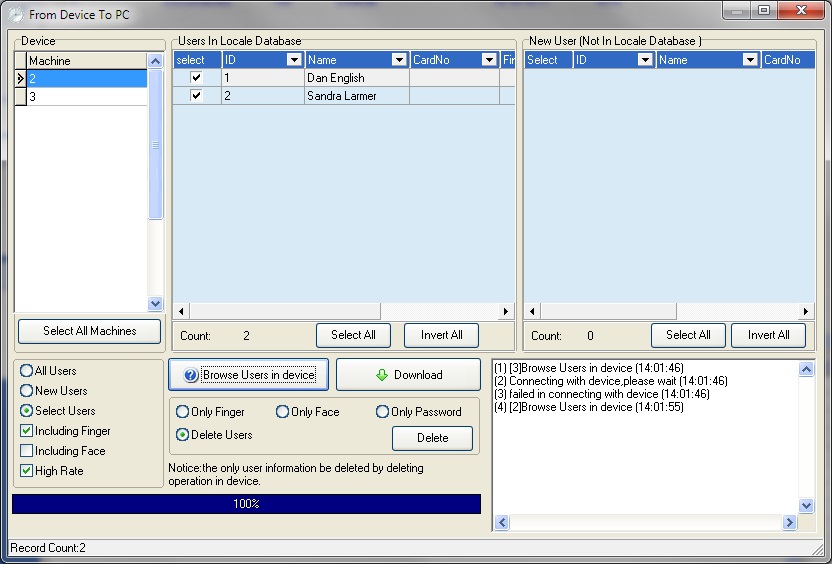
Choose what Machine to Download info from. Click "Browse Users in device" to confirm the users are in the machine Click "Download"
Recording a new Employee's Fingerprint
When an employee has been added and uploaded the Finger Print can be recorded then backed up to the ZK Software.
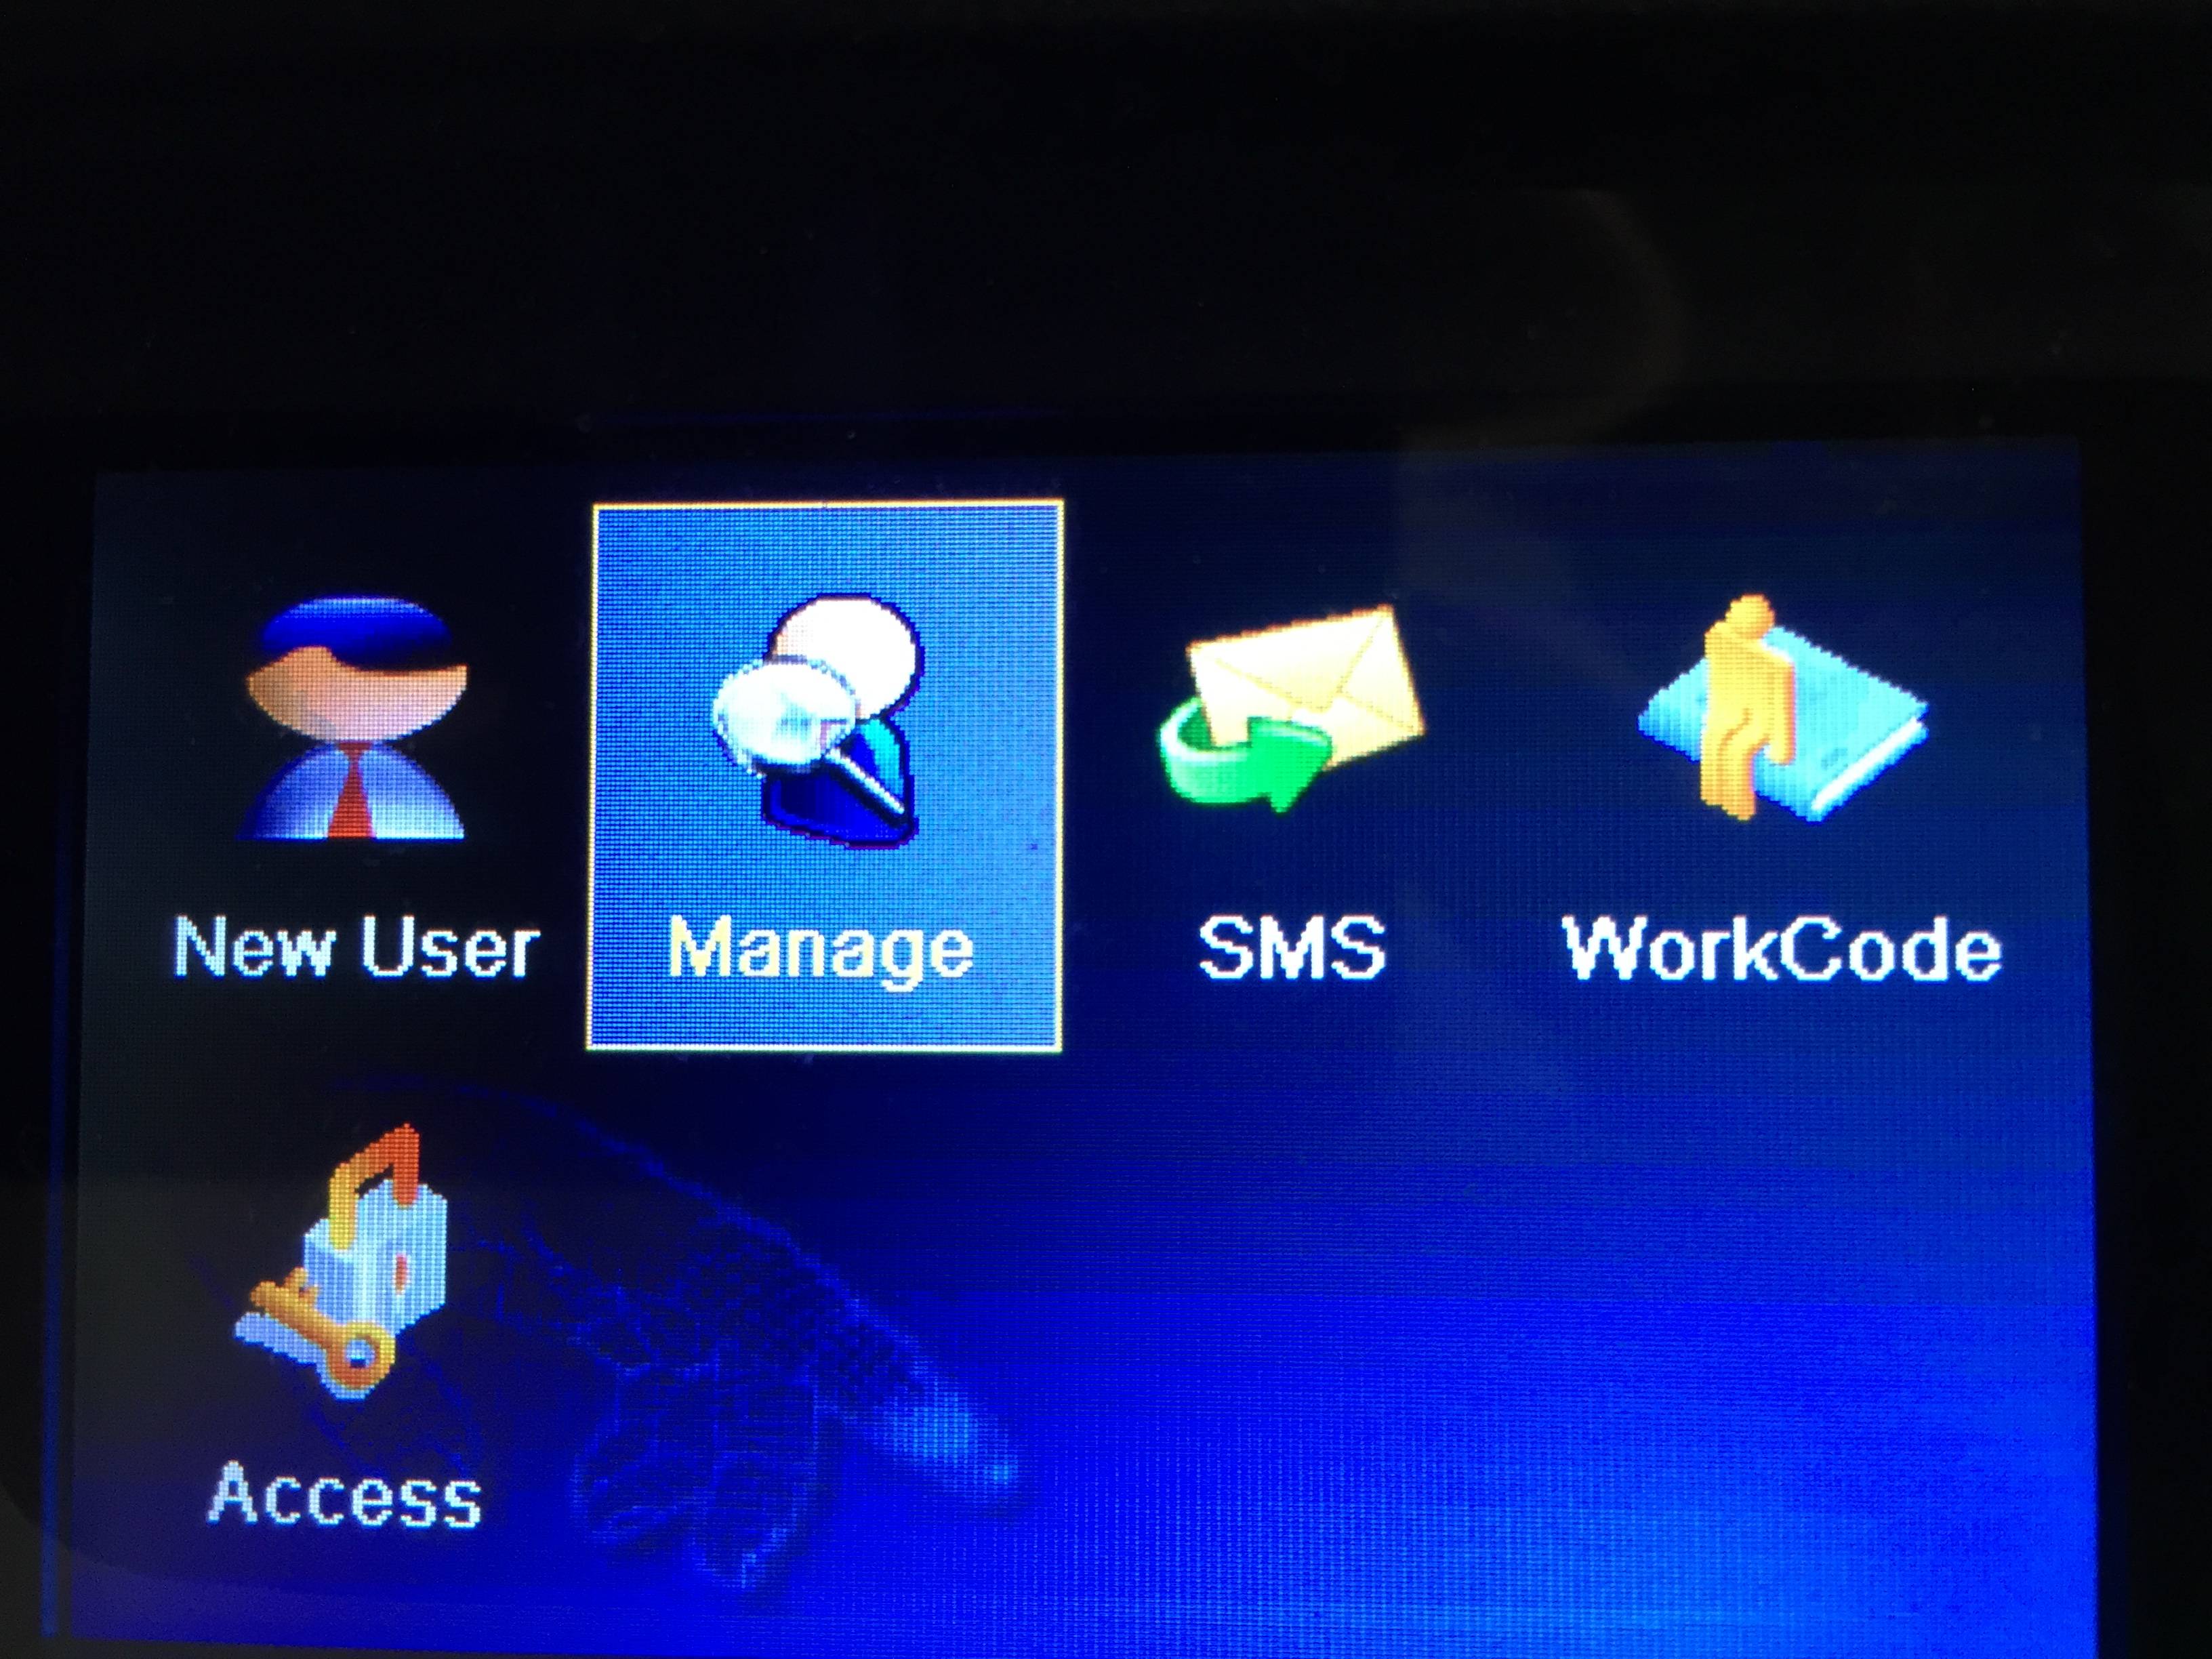
Press the M Key on the Time Clock to access the Menu. Access to the Menu requires Administrator access.
Choose "User Mng"

Choose "Manage"
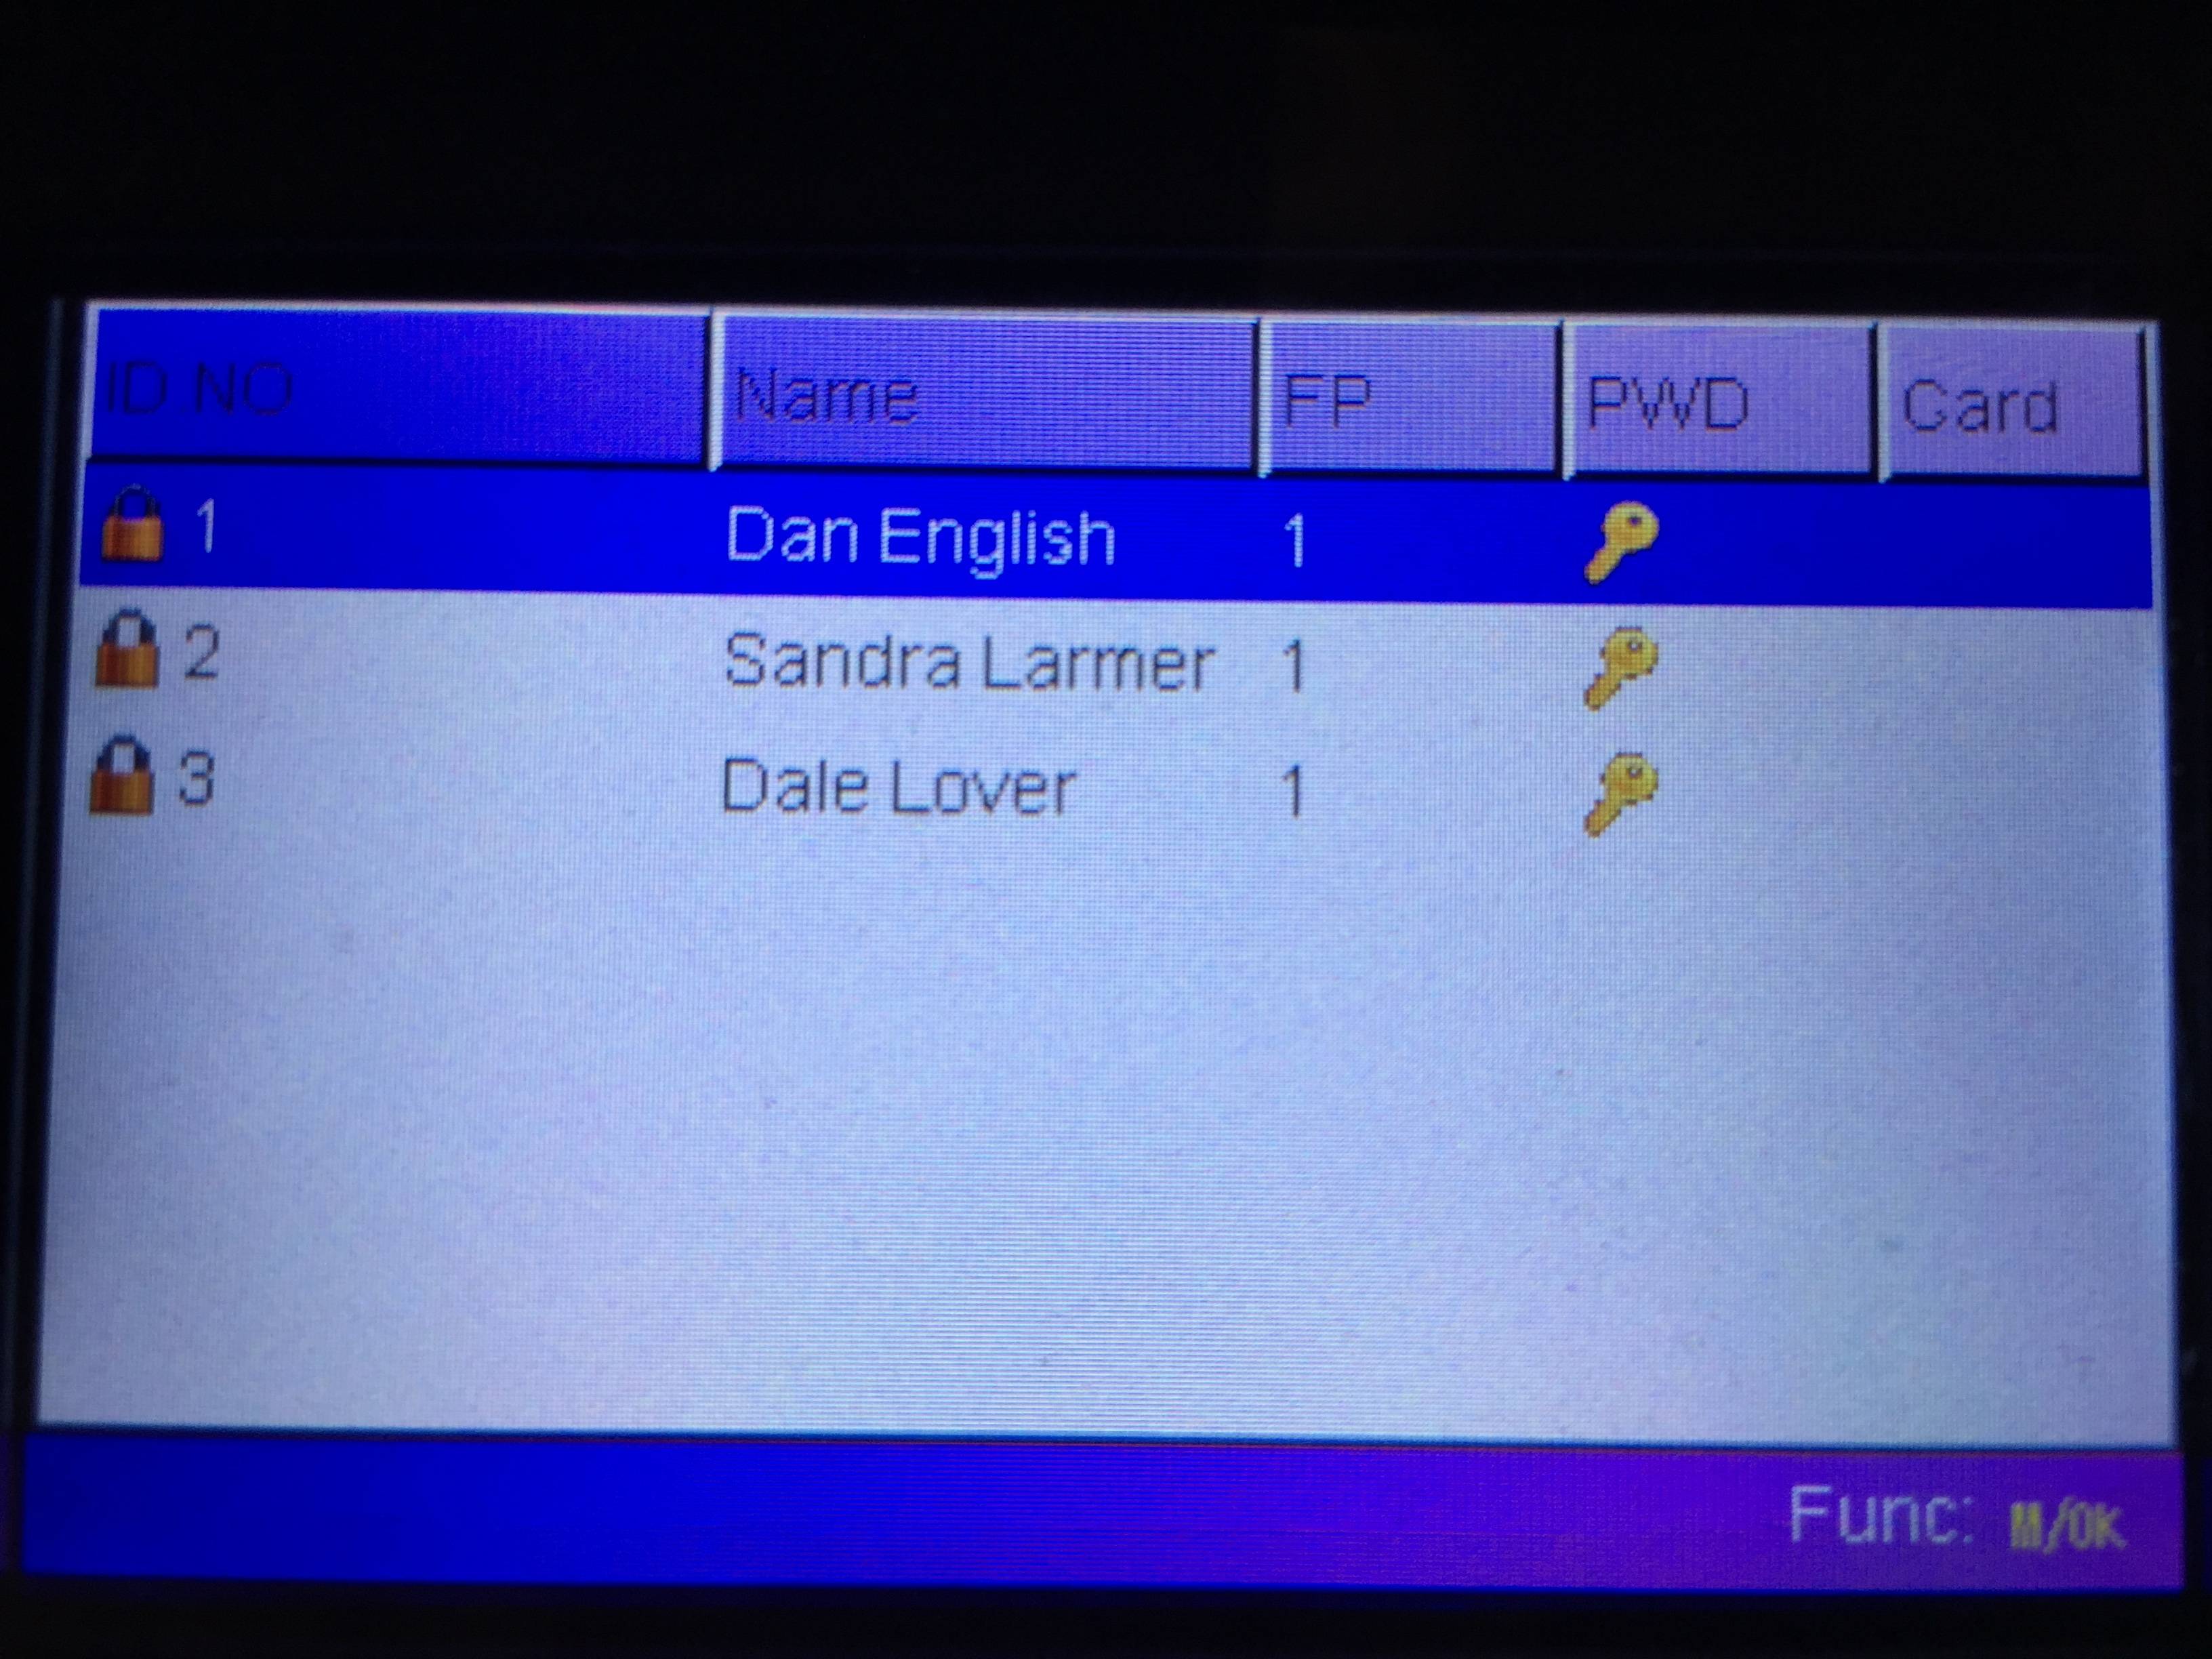
Choose the Employee to set the Finger Print for using the arrow keys.
Choose Edit from the Menu
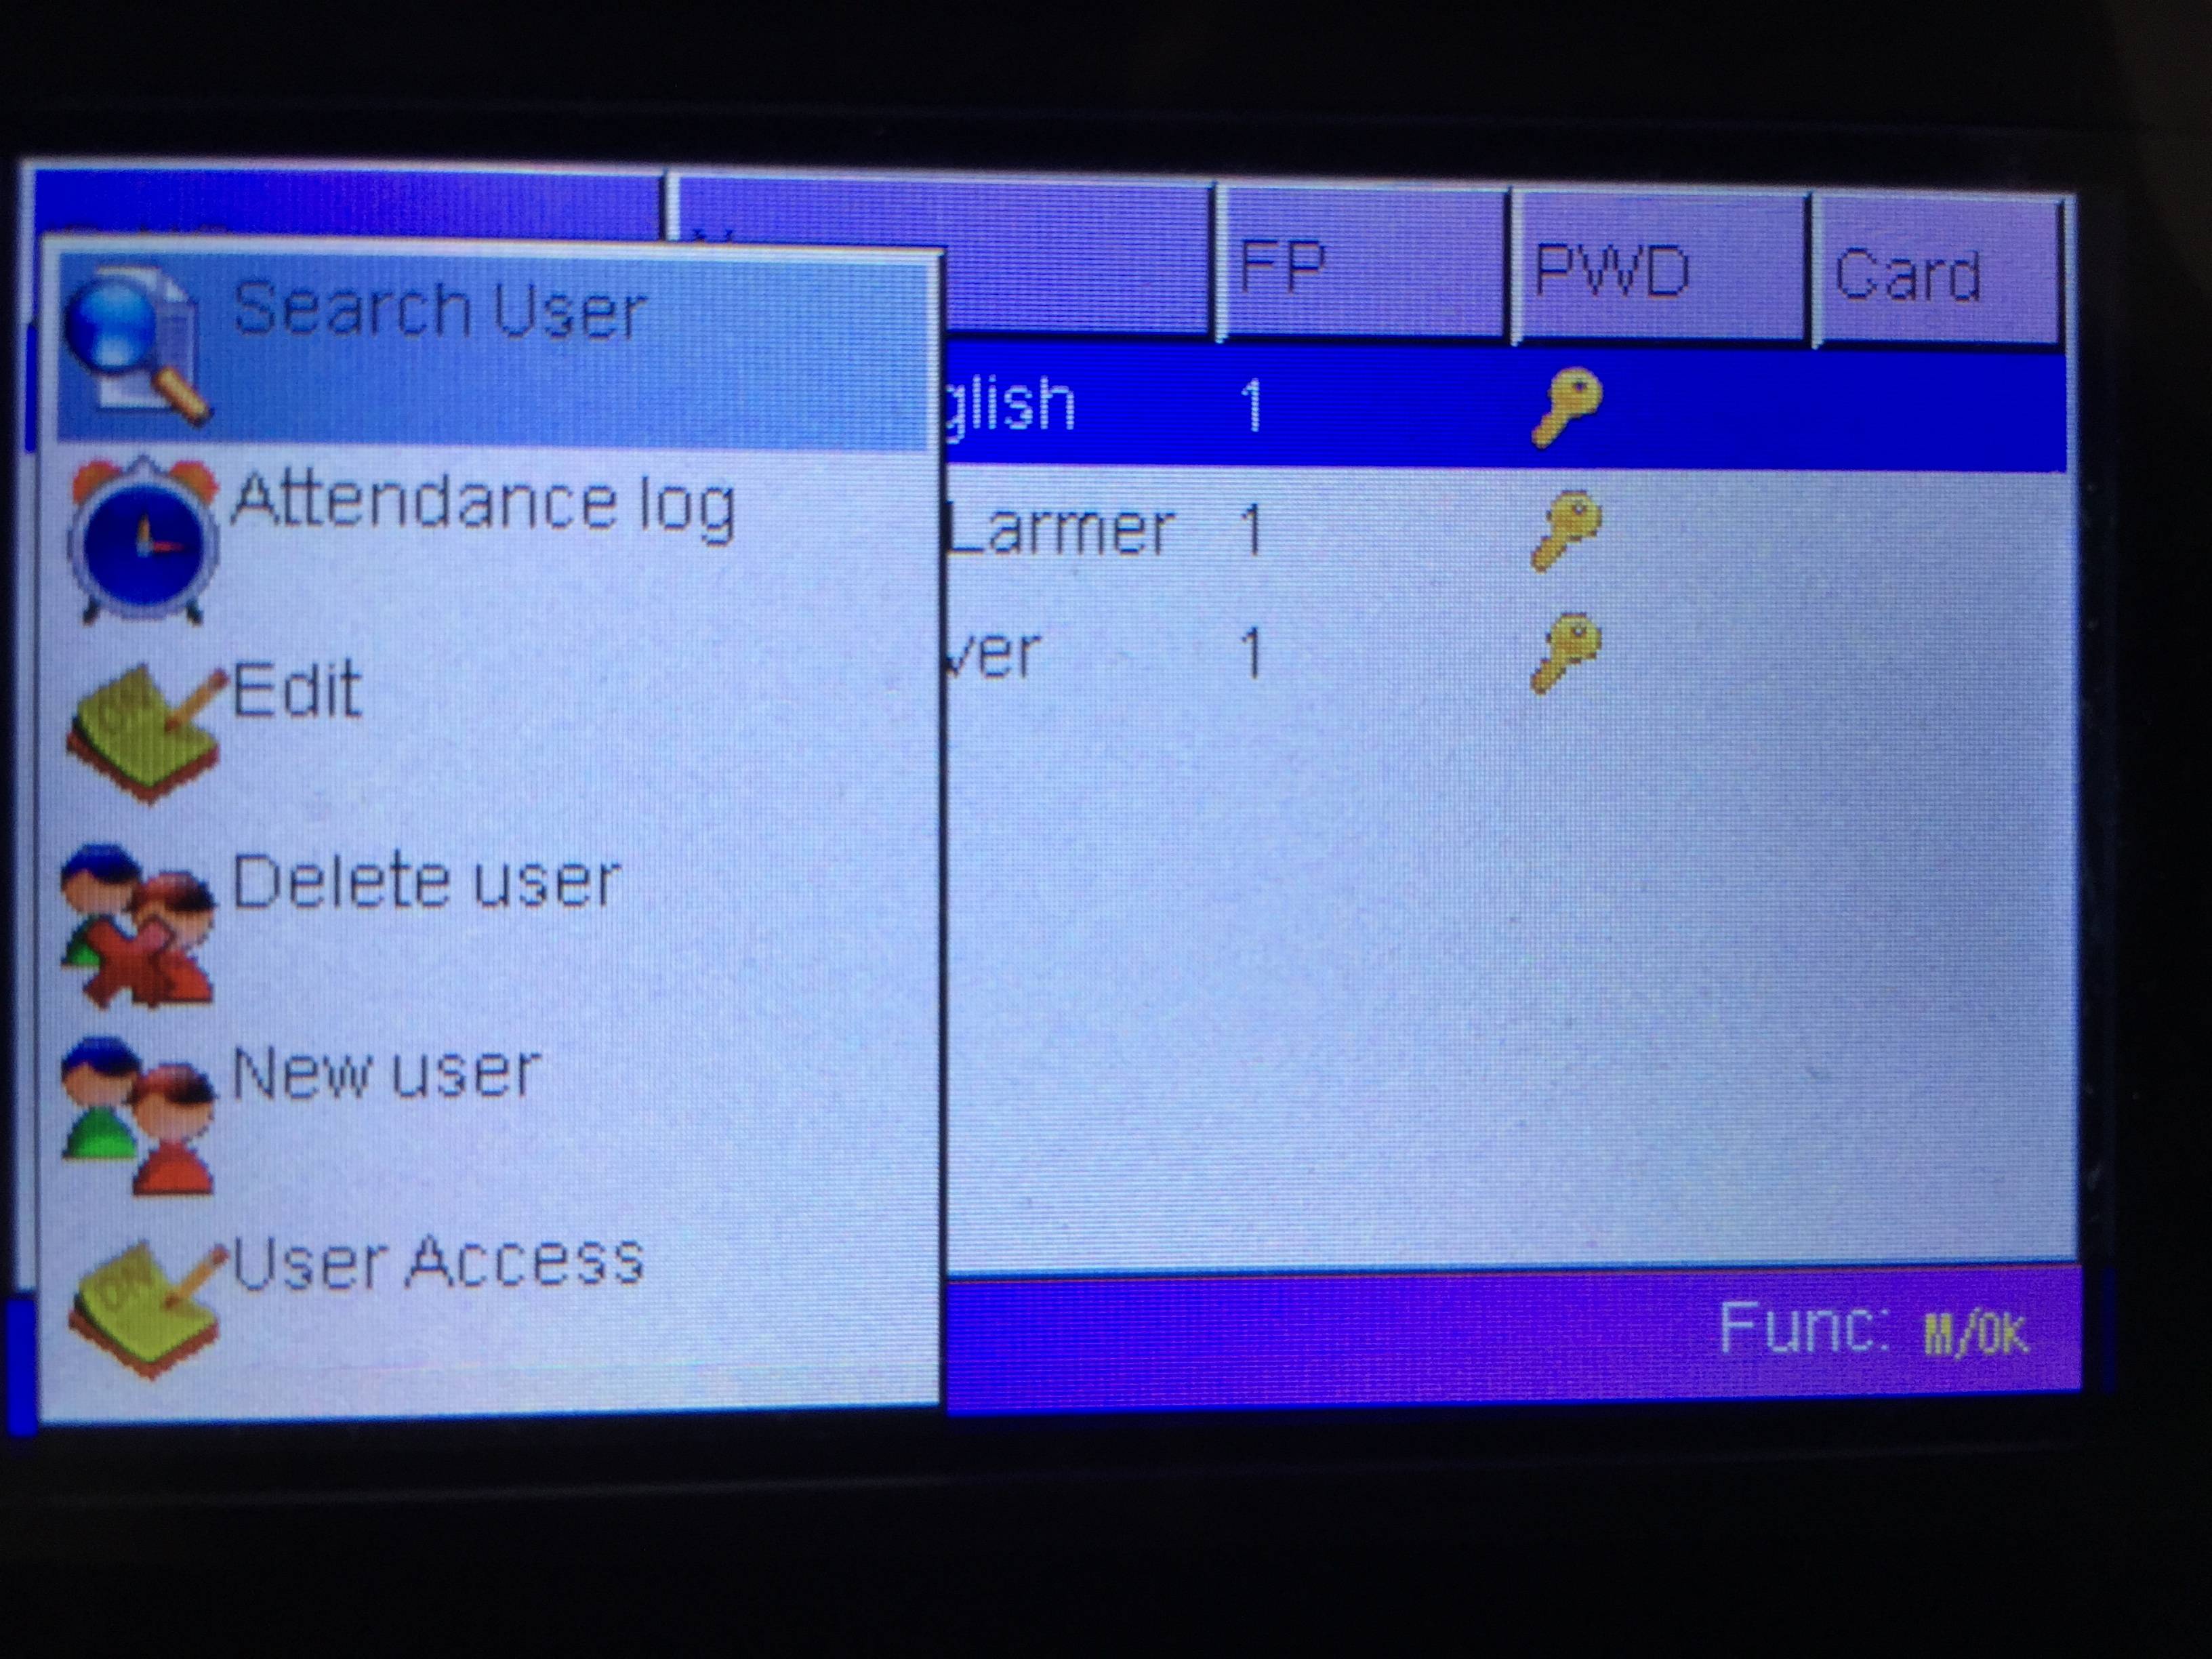
Choose "FP" from the Edit screen using the arrow keys.
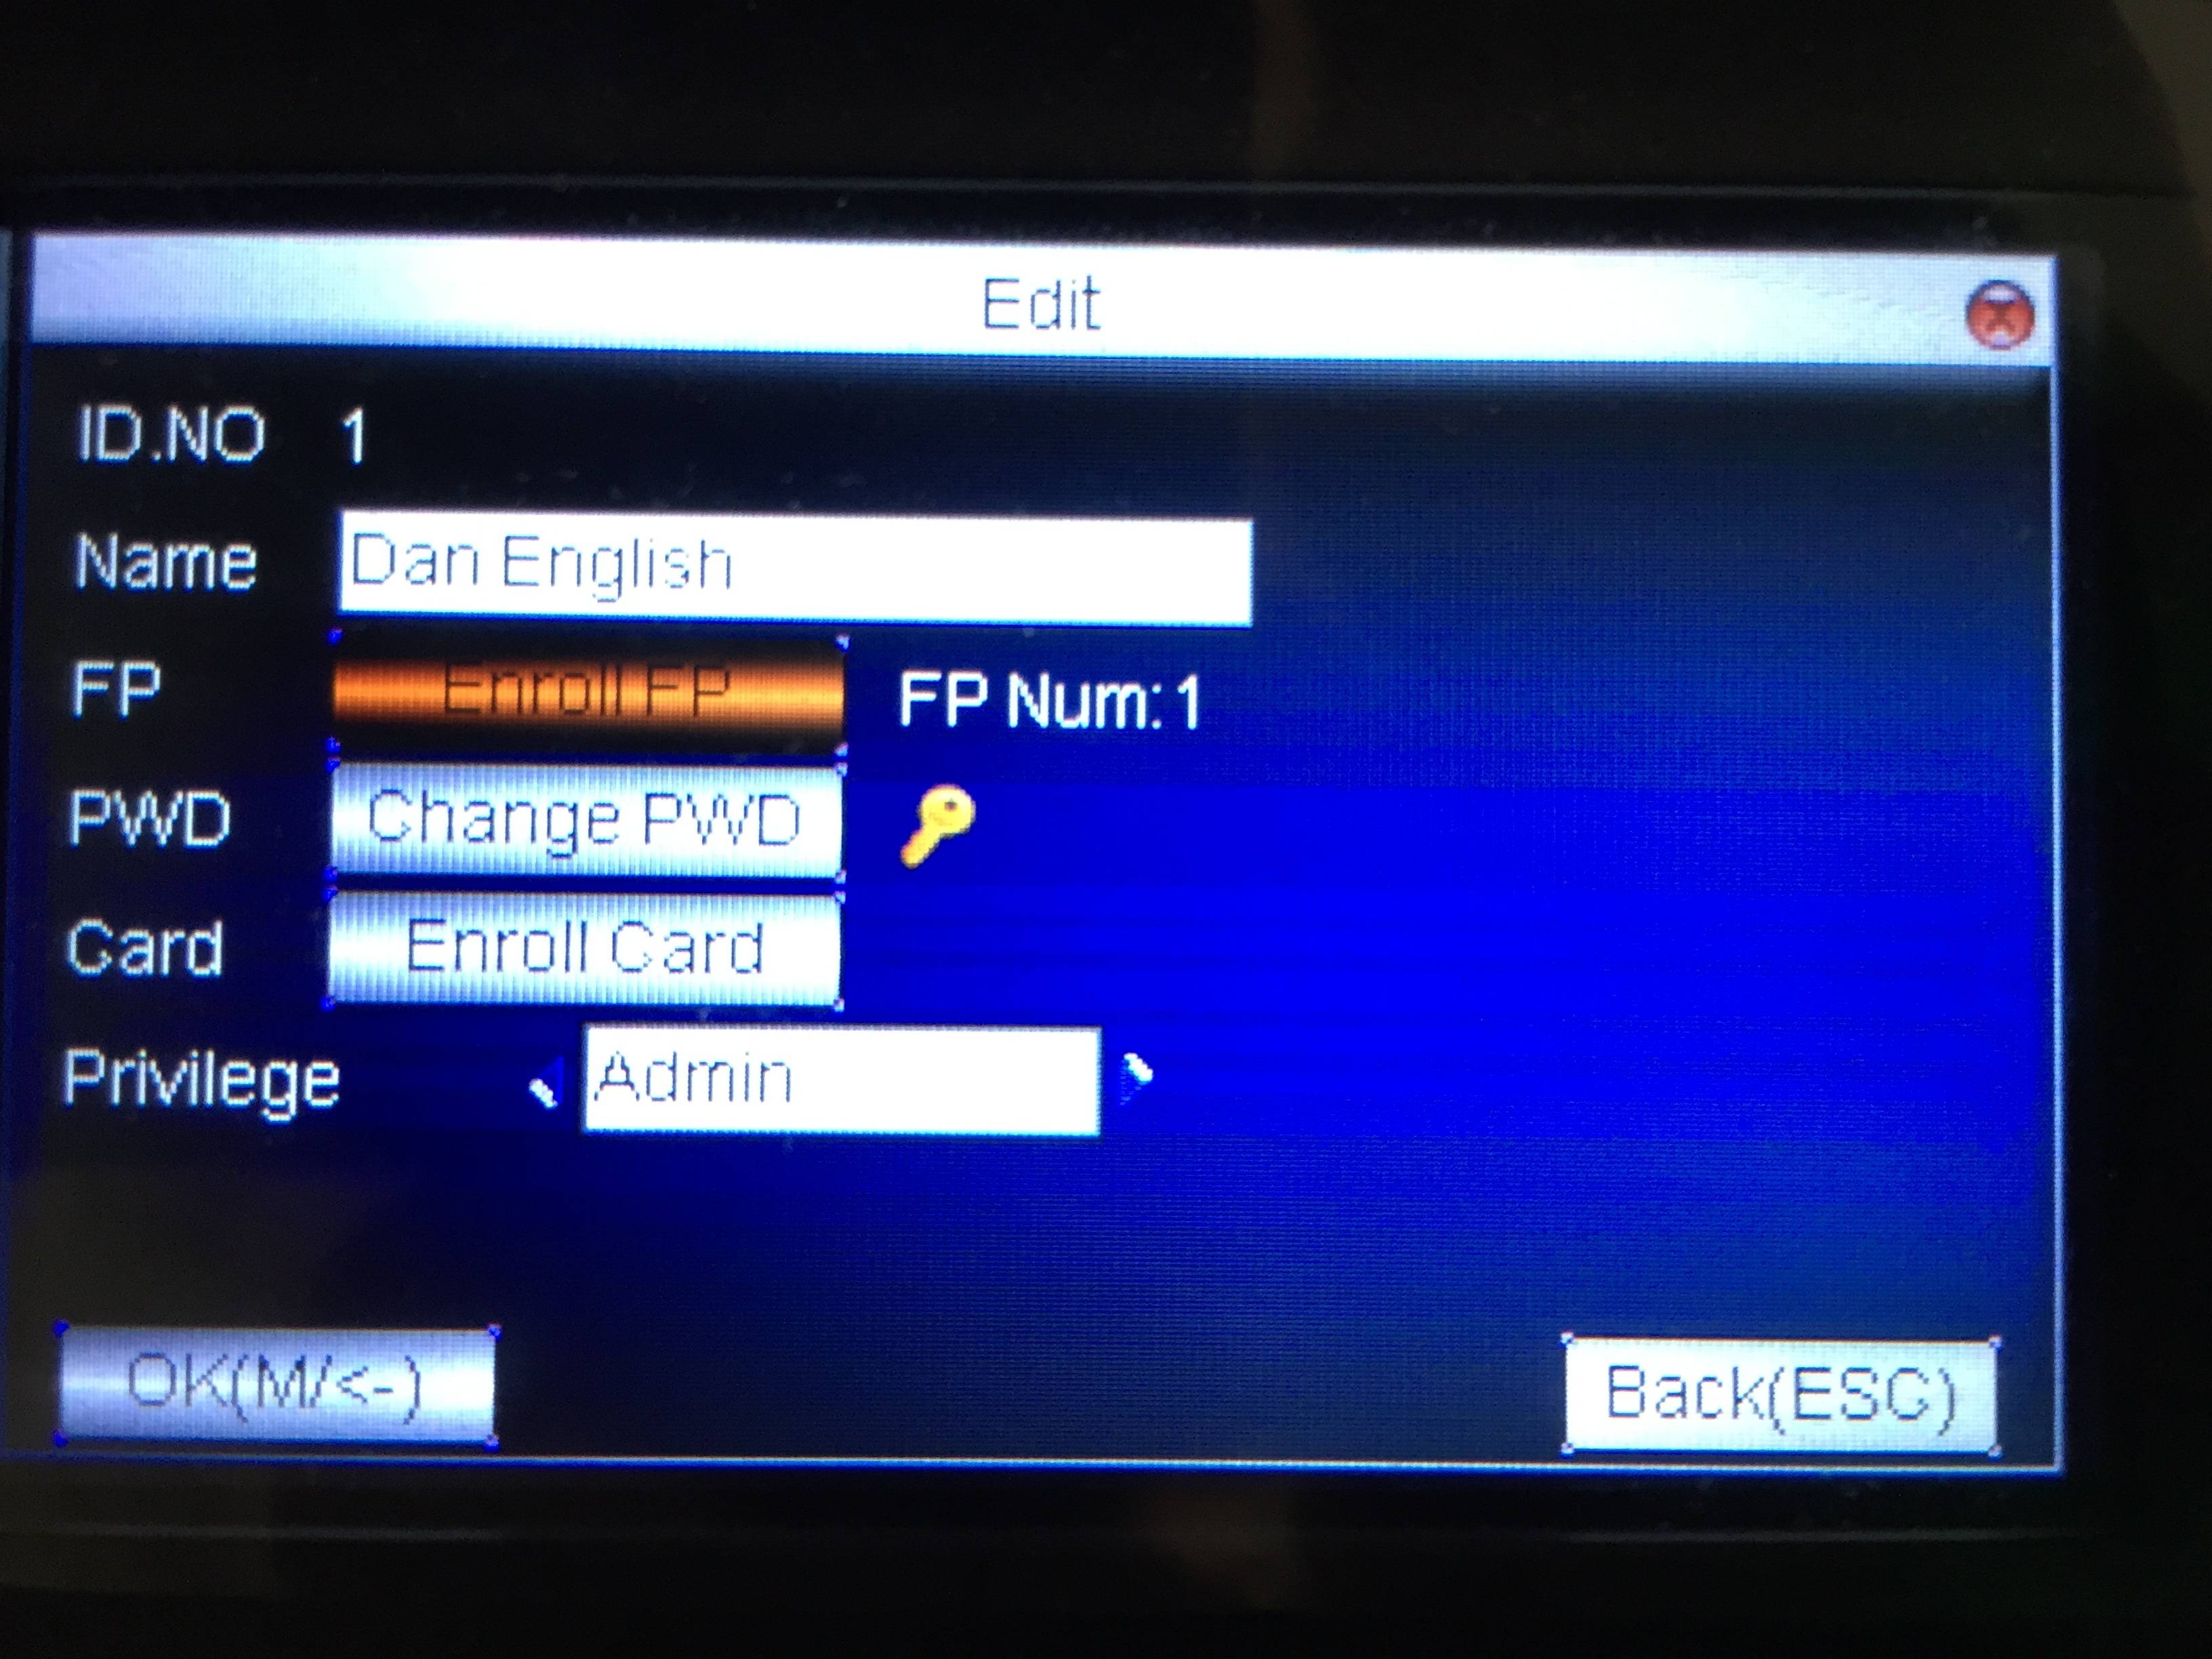
The employee will now be prompted to touch the Finger Print reader 3 times to get a good image of the print.
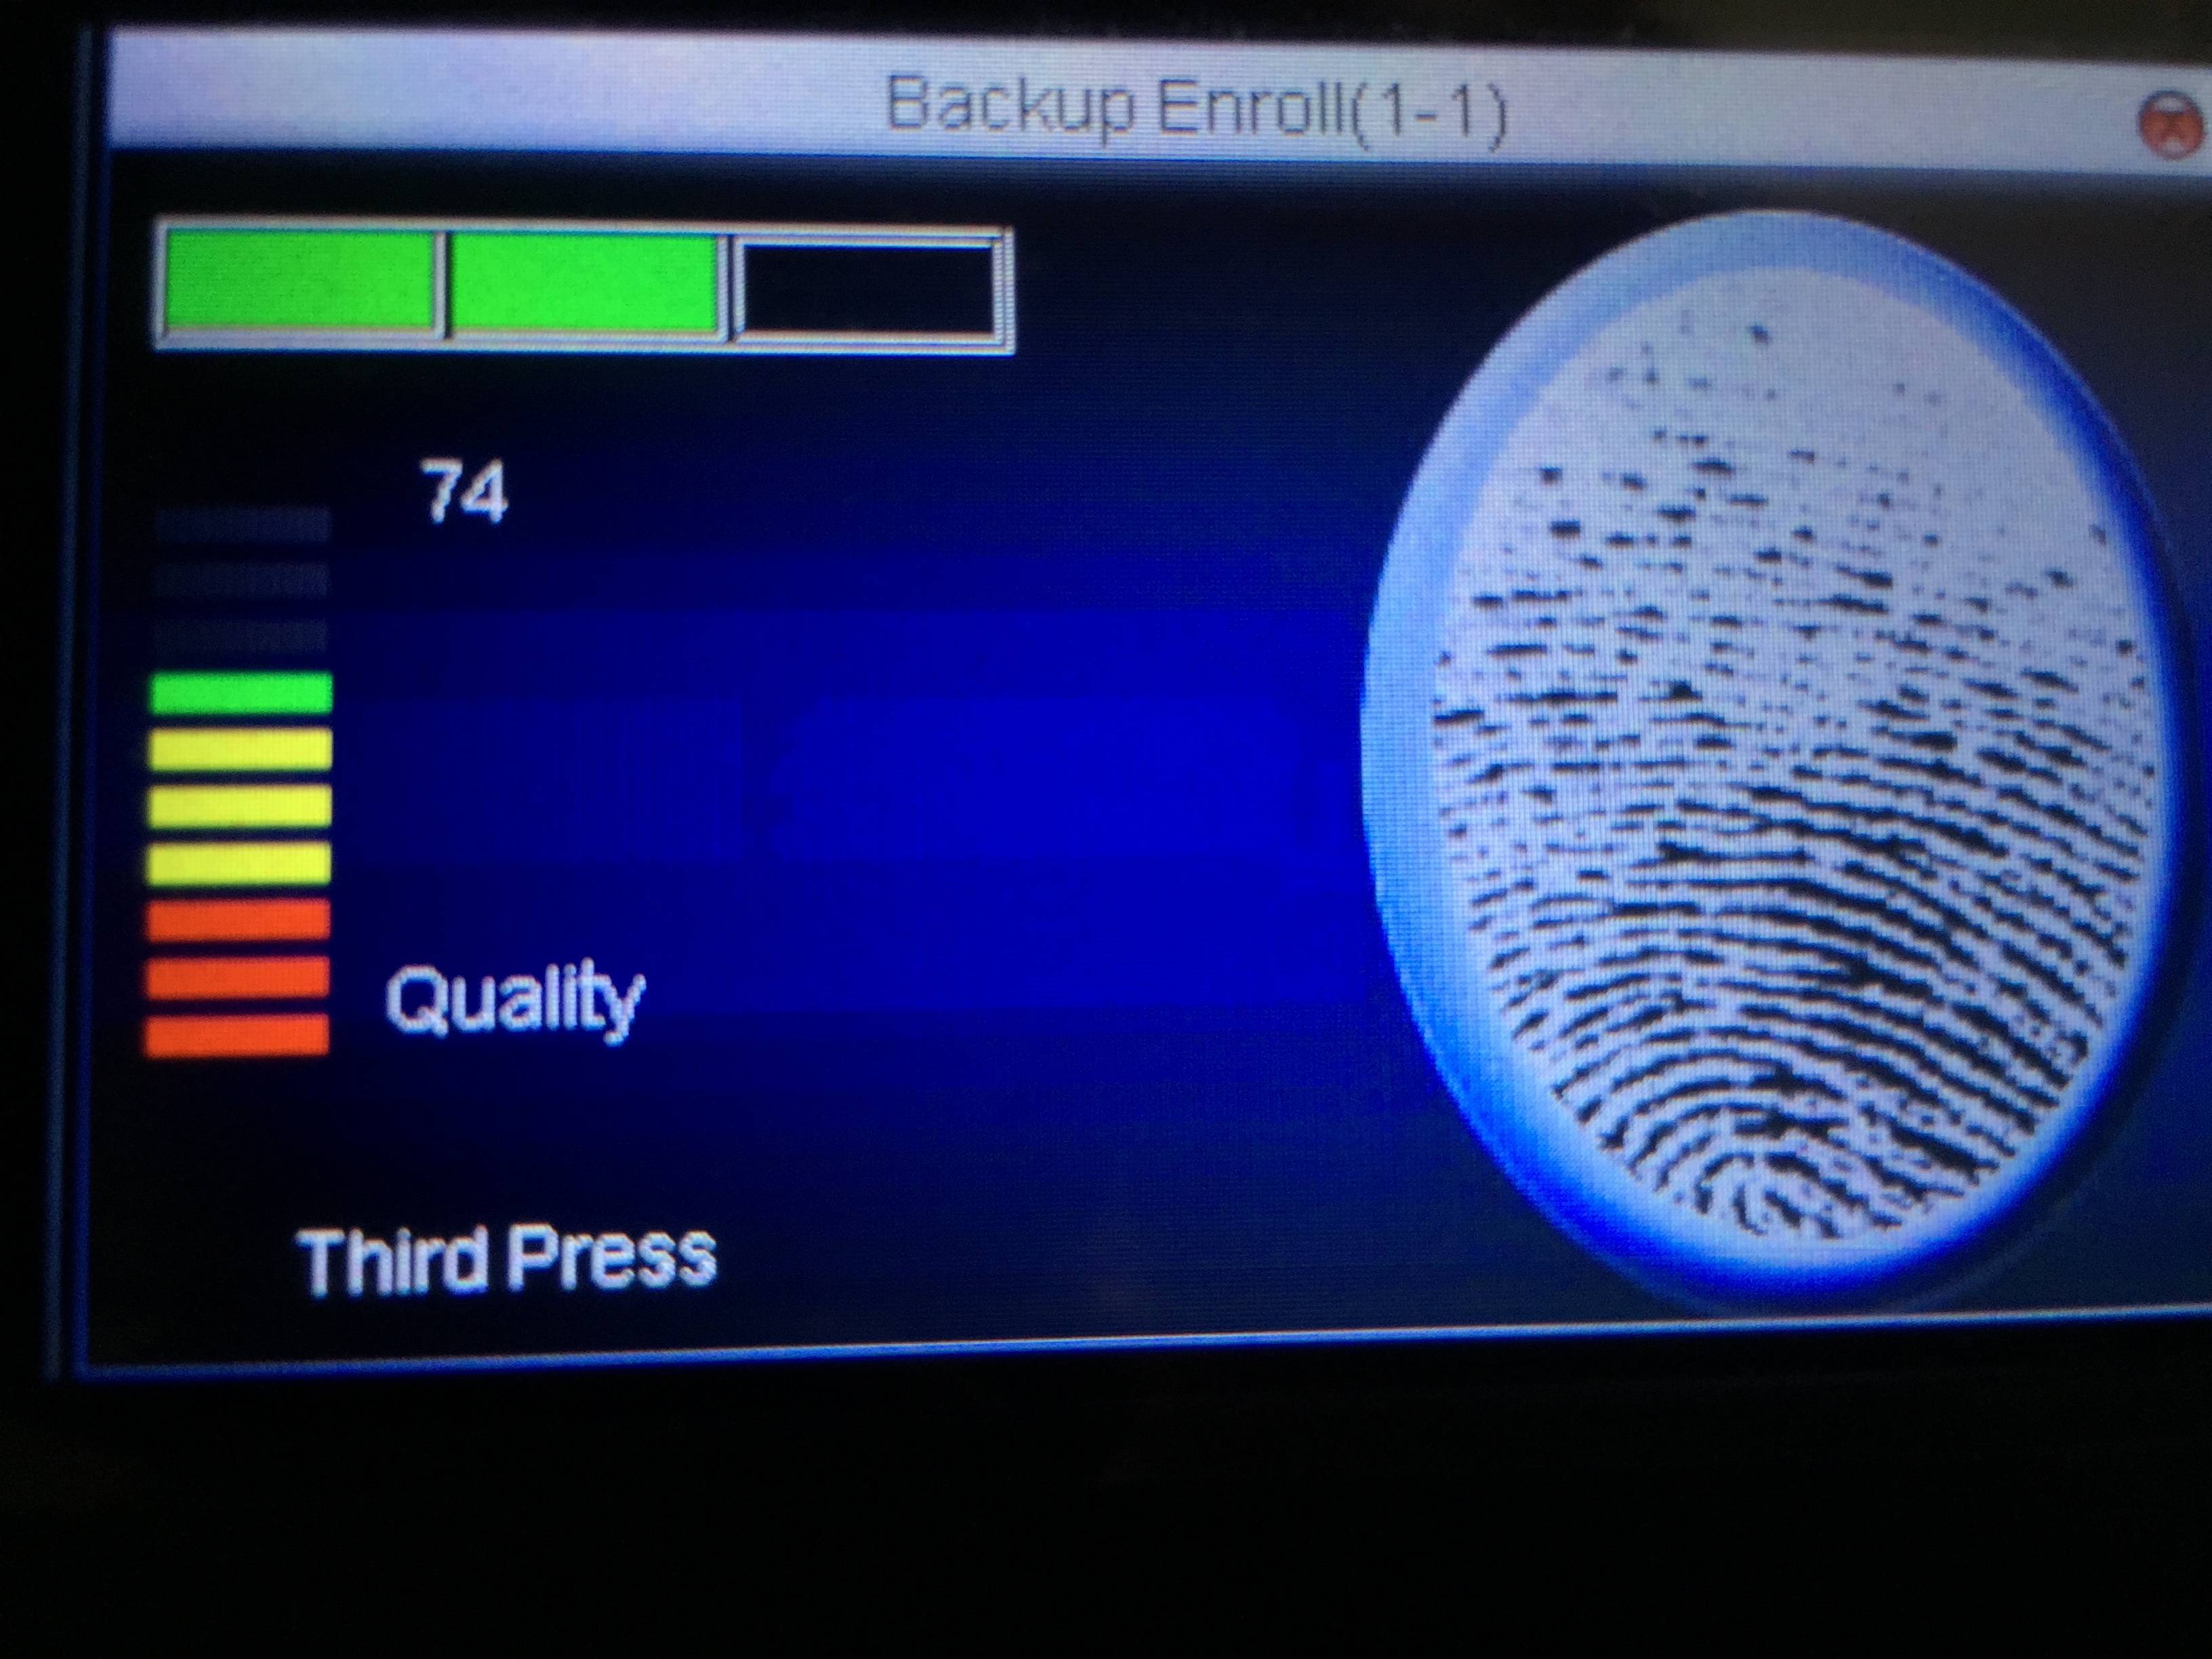
When the Time Clock reports Success use the arrow key to highlight OK and save the Finger Print. Press ESC to return to the menu.
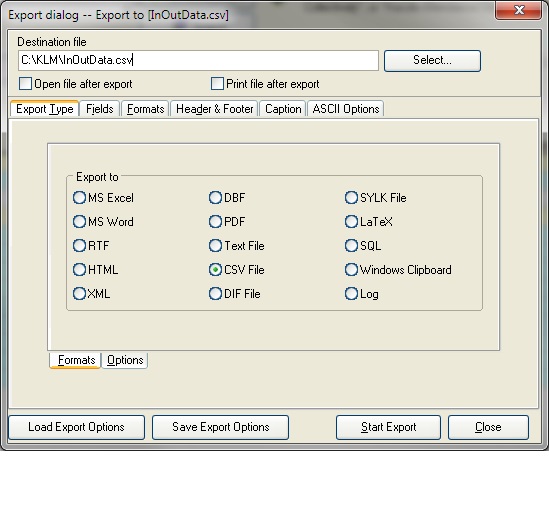
Setup the Report
Click on the AC Log icon
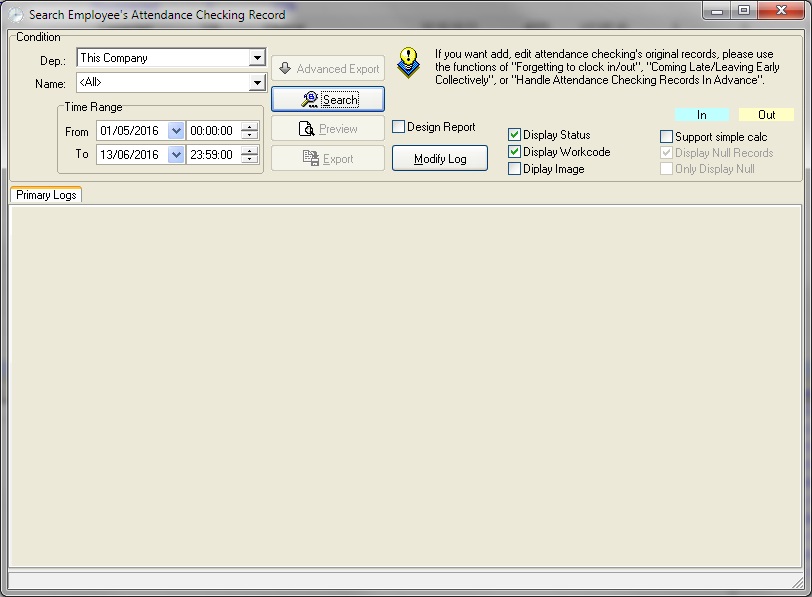
Click on Search to load some records (the Advanced Export button won't turn on until there are some records loaded)
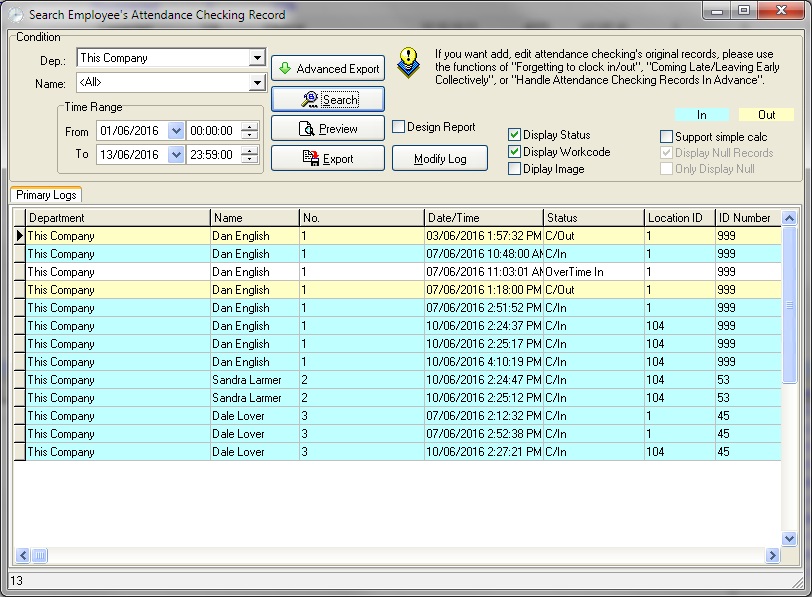
Click on Advanced Export
- Enter the local KLM folder for the Destination File
- the name of the export files is always InOutData.csv
- so the complete path would be C:\KLM\InOutData.csv
- Export Type - CSV File
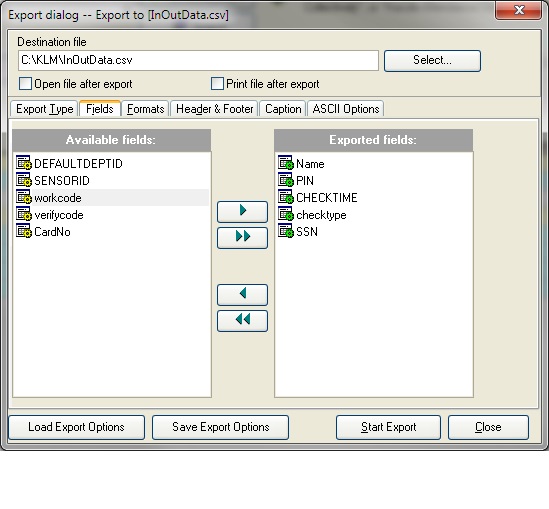
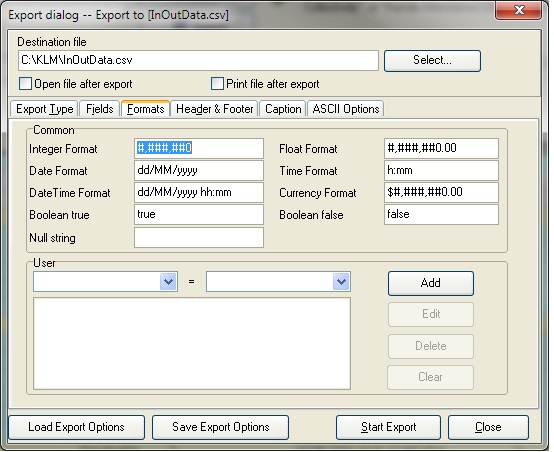
Report Tabs
Fields - ensure these are the fields
Formats - change the "Date Format" to "dd/MM/yyyy"
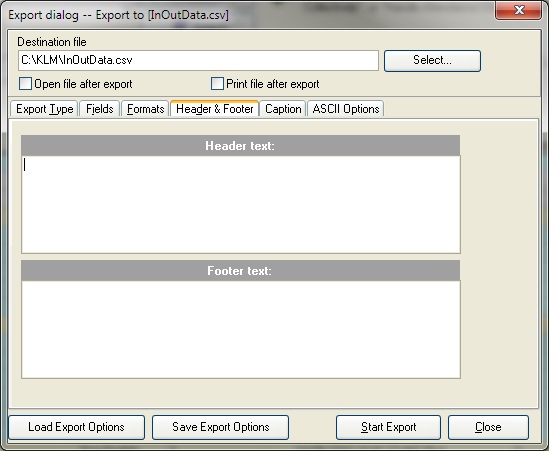
Header and Footer -no change
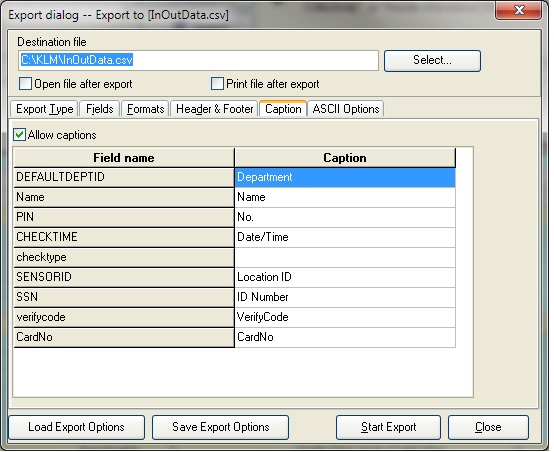
Caption - leave defaults
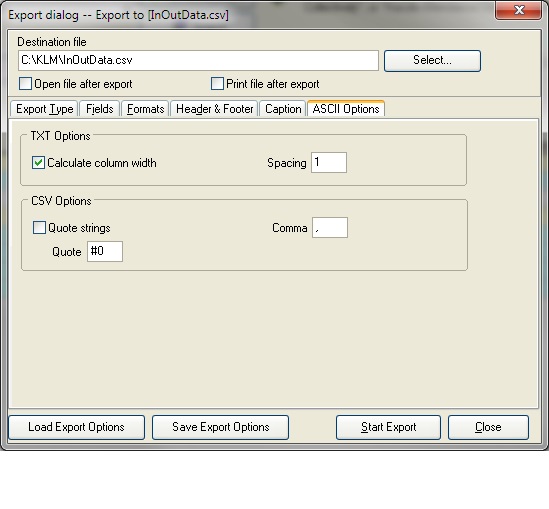
ASCII Options
- Un-check Quote strings
- blank Comma
Click on Save Export Options to save these options.
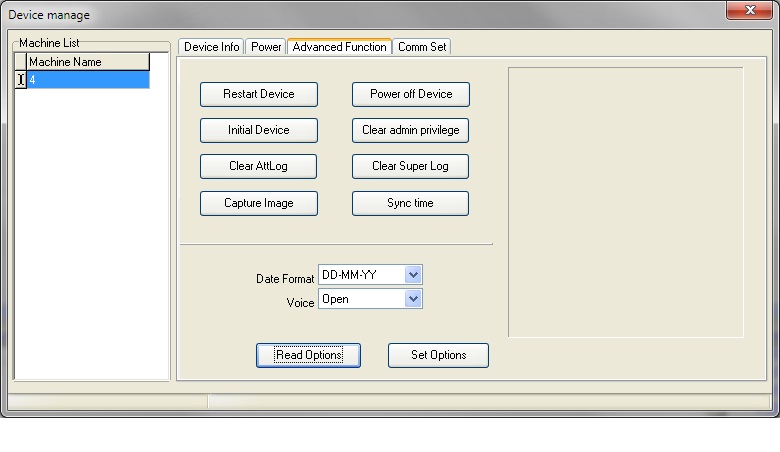
Setting up New Clock
- Connect to the new clock by selecting its IP address and clicking "Connect"
- Click on "AC Manage"
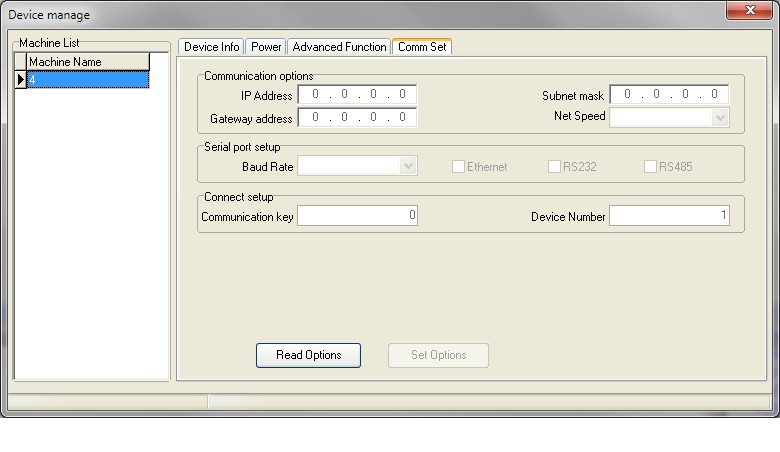
- If you are only connected to 1 clock click on "Read Options" and settings will be read from the clock

Click on Tab "Advanced Function"
Change the Date Format to "DD-MM-YY"
Click on Button "Set Options" Click on Button "Sync Time"
The clock should now have the correct time and date format for KLM.