Direct Bank Deposit Setup
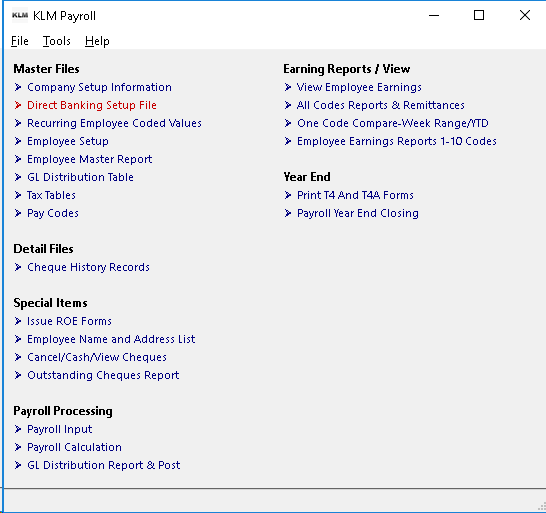
Direct Banking Setup File
Purpose
The information entered here, is needed to create the correct Electronic File that will be sent to your bank via the internet.
This information is accessed when the bank stubs are printed. (see PAYROLL CALCULATIONS Menu #20 for details).
If you only wish to print PAY Stubs and do not wish to transmit a Bank Deposit File, this option can be left blank.
Requirements - Direct Banking Via Electronic File
Each Banking institution has it's own requirements for Direct Banking. It is necessary to contact your bank and inquire about the appropriate procedures and communication software that works with their system.
If the Direct Banking File feature is active, an electronic file will be created during the printing of the bank slips. This file is sent to your banking institution. The printed bank slip is given to the employee as confirmation of their pay.
The layout of the electronic file is different for each banking institution. The program has been designed to work with any of the following Banks;
- Toronto Dominion - 004
- National Bank - 006
- Royal Bank - 003
- CIBC - 010
- Bank of Montreal - 001
- Scotia Bank - 002
Entering Information Into This Option
Record one will define bank modem information for Company 1, record two for Company 2 as each of company can have it's own bank and modem file information. If you have more than one company set up and only one record for company 1 exists in this file; all companies will access company 1's information.
Information entered here, will be supplied to you by your bank. If an active record exists it must be filled in appropriately.
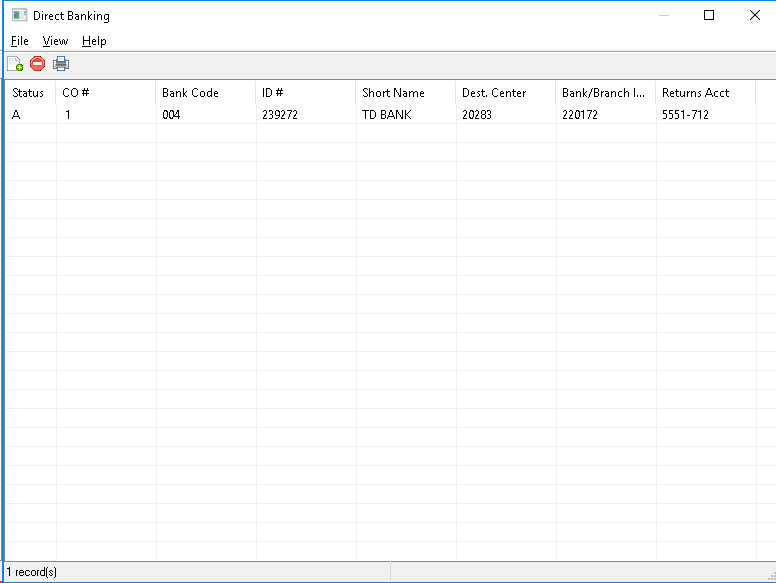
Upon first entering this option, the program will display a list of all bank records. If no records exist, the program will show a blank screen.
Add a Record
When adding records, the system will automatically select the next available existing Company number.
1) From the MENU, CLICK on FILE, then CLICK on NEW. A blank data record will appear.
2) Fill in the appropriate information (see field definitions listed below) then SAVE the record. Use the SAVE Button at the bottom right corner of the current window.
Updating or Deleting Existing Records
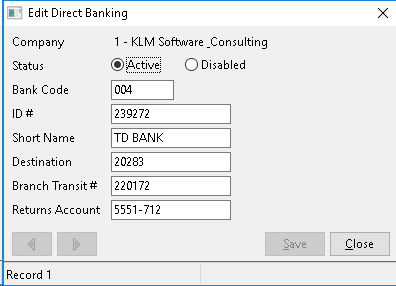
While viewing a list of existing records, locate the company record line you wish to update and select said company by Double Clicking on it. The record's contents will appear in an EDIT window.
UPDATE - Make the appropriate changes, then SAVE the record.

DELETE - Change the STATUS from ACTIVE to DISABLED and the system will ignore it. The line will not disappear and can be made active again at any time by switching back to ACTIVE from DISABLED.
Listing Records
At the MENU Bar, CLICK on FILE than CLICK on PRINT. A standard Windows PRINT Screen will appear. Select your printer then continue.
Field Definitions
You will need to acquire some of the information from your banking institution. They will tell you which fields are to be filled in. Not all fields are used by all banks.
Field |
Definition |
STATUS |
Determines whether the record is ACTIVE (A) or DISABLED (D). The program automatically sets the record as Active but you can disable (or delete) the record by changing it's status. |
BANK CODE |
Refers to the internationally unique number assigned to each banking institution and is referenced on your Company cheques. This code is used by the bank slip program to create the correct modem file layout required by your bank. |
ID # |
This ID, identifies the company, who is sending the data (Originator) file. This number is unique to your company and is assigned to you by your banking institution. |
SHORT NAME |
This field stores the Company's formal Business Name for use in identification of each company. |
DESTINATION |
This field indicates where the transmission or data file is to be sent for processing. |
BANK TRANSIT |
This field indicates the Banking Institution to which (Bank/Branch) the file is being sent. |
RETURNS |
This field will hold the Company's Bank ACCOUNT Number to which any returned items will be sent. |
All About the Direct Banking Feature
SETUP
1) Each employee, who wants their pay direct deposited into their bank account, must provide you with their Bank#, BRANCH# and Account#. This information must be placed in their Employee Master Record in MENU#5.
Once the bank feature is activated, the cheque program produces a bank file entry for these employees and a bank slip instead of a pay cheque. All employees without this information will still have a pay cheque produced.
2) Once the Bank Deposit feature has been activated, you will need to add a record into this option before you run a direct deposit pay. The bank will provide you with the necessary information for this file.
If you are unsure as to whether the feature has been activated or your bank in NOT among those listed, contact KLM Software.
3) You will need to coordinate equipment access and testing with your bank. The File you will be transmitting will be produced automatically during the Bank Slip printing program, which runs after each pay calculation register (MENU #20). The Name of this file is ECA.DAT (for National=xxxxx.TFE, for CIBC=ECAxx.DAT) and will be located in the KLM Payroll File Folder.
Transmission instructions and problems should be directed to your bank. Problems with the Bank Deposit program or the file produced by the program should be directed to KLM Software.
How the Direct Deposit & Bank Slip Feature Works
When activated, this feature, will print bank deposit slips instead of cheques for those employees with Banking information entered into their master records (see PAYMENU #5). All other employees will continue to receive a printed pay cheque.
It is during the Calculation Cheque Register PAYMENU #20 that employee banking information comes into play. As each pay input record is calculated, a cheque print file record is created and marked to indicate if it's a cheque or a bank slip. Cheques are assigned a cheque number and history record numbers are assigned to bank slips.
After the register report is complete, the Cheque printing program will cycle through the cheque print file, looking for records marking them on cheque forms. Next, the bank slip printing program will cycle through the cheque print file looking for records marked as bank slips and print them. If the Direct Banking feature is active, this program will also create a data file (ECA.DAT) which must be transmitted to your bank. This step must be completed without interruption to create a complete modem file.
You will know that this step is complete when you get the prompt to save the cheque print file. Answer Yes just in case.
KEEP IN MIND, as long as you don't delete the cheque print file at the end of the run you can make modifications to the banking information for a company or employee and recreate the modem file, by printing the bank slips again. Even if you restart bank slip printing at a certain number, all bank slips will be looked at again in order to recreate a complete modem file.